


Please welcome the M2R DT for the spring 2010 term!
Holly-Holly
carolinagirl-Aimee
Courtneyannb-Courtney
Char4355-Char
Wednesday, December 16, 2009
January-April 2010 Design Team
Posted by
Moments 2 Remember
at
6:02 AM
3
comments
![]()
PreSALE January Kits

PRESALE@$24.99 through January 5th. January 6th-$29.99 RETAIL VALUE-Over $40.00 The best of scrapping comes together in one fantastic kit. From wings to bling, die cut papers, buttons and more-you will be amazed by the wonders of this kit. Ready for shipping to you-today! Shop Now
Posted by
Moments 2 Remember
at
5:53 AM
0
comments
![]()
Wednesday, December 9, 2009
We've been Busy


The temporary Design team has been very busy creating layouts with the M2R December Kit. Only two kits available -grab yours today!
Posted by
Moments 2 Remember
at
9:37 AM
1 comments
![]()
Sunday, November 29, 2009
M2R Online Store
We are pleased to announce the M2R online store is re-opening! Please be patient as we slowly load in inventory. Please let us know if there is an item you would like to see the store carry!
We are currently carrying Bella Blvd, Collage Press, and May arts ribbons. More will be added weekly!
SHOP now
Posted by
Moments 2 Remember
at
6:43 AM
0
comments
![]()
Saturday, November 28, 2009
M2R Christmas Kit

Many new things are happening at M2R. December is the transition month for new ownership, store, and kit designer-to start January 1st!
Your Price $19.99
Shop now
Posted by
Moments 2 Remember
at
9:13 AM
0
comments
![]()
Tuesday, November 10, 2009
Technique Tuesday

Happy Tuesday everyone! I wanted to share some tips for getting a holiday photo done. It is one thing that I start to stress about a little bit, knowing that those cards will need to be mailed out soon!
Start early. Now is a good time to start thinking of getting the family together for a picture. Decide what everyone will wear and what you want the background to be. Even going to pick your tree could be a great photo moment. Find someone to take the photo for you, or set up the self timer on your camera. Take allot of pictures when you are set up. The more people that you have in a picture, the more pictures will be need to be taken to capture the perfect moment (and account for those closed eyes!)
-Val
Posted by
Moments 2 Remember
at
10:53 AM
5
comments
![]()
Tuesday, November 3, 2009
Harvest


Kit Contents:
Patterned Paper (double sided- 2 sheets of each):
Pink Paislee- Amber Road: Bonfire
Pink Paislee- Amber Road: Autumn Blossom
Pink Paislee- Amber Road: Apple Cider
Pink Paislee- Amber Road: Harvest Hayride
Pink Paislee- Amber Road: Paislee Postcards
Pink Paislee- Amber Road: Fall Festival Die Cut Paper (single sided- 1 sheet)
Embellishments:
American Crafts- Thickers: Lax Black Glitter Letter Stickers
Jenni Bowlin- 5x7 Bingo “Home” Card
3 K&Company- Life's Journey Metal Art Frames
9 Kaiser Craft- Paper Flowers: Sepia (3 sizes/3 of each)
4 Prima- Fabric Flowers: Black Diamond
10-15 ColorStories- Adhesive Pearls: White
10-15 ColorStories- Adhesive Pearls: Black
3 Jenni Bowlin- Pearl Flowers: Cantaloupe
6 Metallic Mini Brads
½ Yard Metallic Brown Ribbon
½ Yard Black Ribbon
½ Yard Paper Lace Ribbon
Posted by
Sarah
at
1:50 PM
4
comments
![]()
Wednesday, October 28, 2009
November Sneak Peek

I cannot believe November is almost here! Doesn't this sneak look delightful? I have to say, this upcoming kit is amazing. You are going to love it- so full of fall loveliness.
Posted by
Moments 2 Remember
at
10:23 PM
3
comments
![]()
Tuesday, October 13, 2009
Technique Tuesday- Flower Power
 I wanted to give you a little tutorial on how to make a dimensional flower. You can use it as embellishment for a gift, or even to put it on a scrapbook page! I used my example for a gift that I will be giving to my niece this Halloween.
 You will need to cut some strips approximately 1 inch wide by 12 inches.
 Pleat the strips. Then cut the strips depending on to what size you want the flower to be. Then place the cut strips on top of each other and staple together.
 I then used a circle punch to cut out the polka dot paper as the center, and added an alphabet sticker. Happy flower making!
Posted by
Moments 2 Remember
at
11:56 AM
3
comments
![]()
Monday, October 5, 2009
October Kit- Autumn Smiles
 Autumn Smiles is a must have! Along with all the sheets of double sided Bo Bunny paper, you get some sparkle with gems, sequins, beads, and Stickles (and lots more cute embellishments!) This kit is just $22, check out all the details here.
Posted by
Moments 2 Remember
at
7:25 PM
2
comments
![]()
Tuesday, September 29, 2009
October Sneak Peek
 Just want to give you all a little peek of the October kit. Look that those yummy colors and cute little owl!! Full reveal coming soon. Start enjoying the cooler weather and have a great week.
-Val
Posted by
Moments 2 Remember
at
12:46 PM
1 comments
![]()
Tuesday, September 22, 2009
Altered Magnet!
This is a fun, quick and easy challenge. I tend to somehow collect magnets from advertisers. I don't use them, don't want them, but instead of thowing them away, why not turn them into something pretty that you would like to see hanging on your fridge?
So, that is what we are going to do...we are going to take a regular magnet and turn it into a work of art! Please notice that I used papers from the fabulous September kit!!
First, gather your supplies: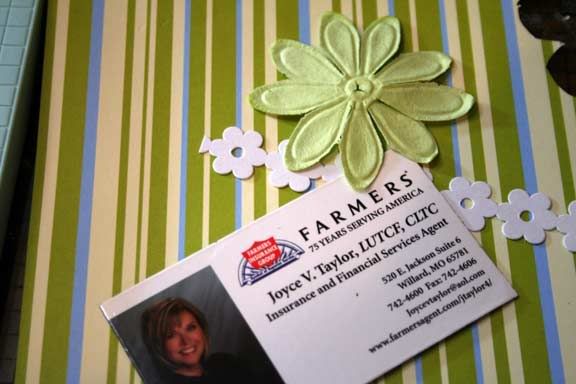
Next, glue the magnet to the paper. 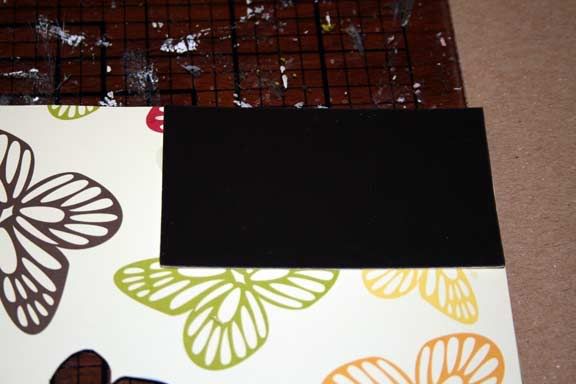
While the glue is drying, prepare embellishments. I cut the butterfly out of the paper.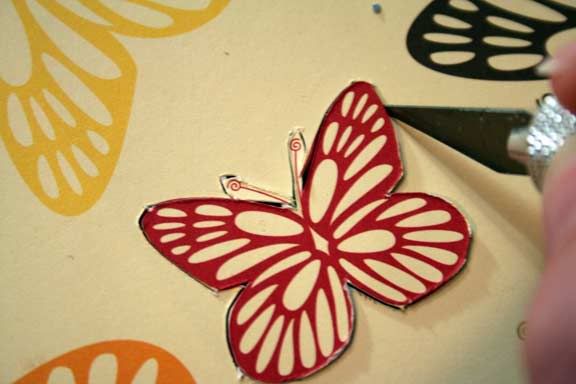
After the glue has dried, ink the edges of the magnet.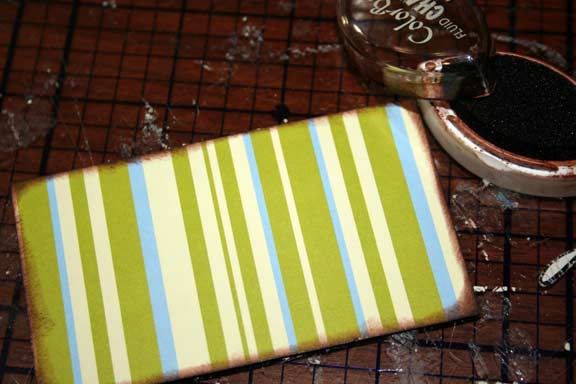
Add your embellishments and hang proudly on your fridge!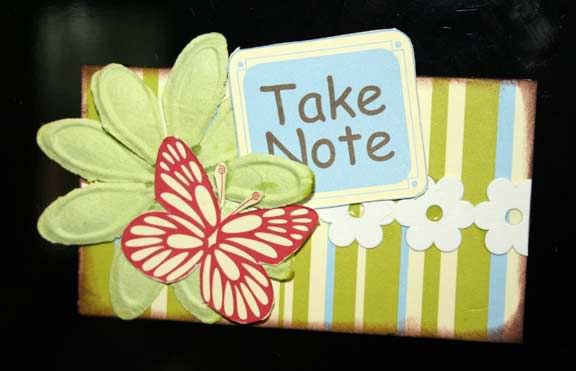
Posted by
Valerie
at
11:24 AM
5
comments
![]()
Tuesday, September 8, 2009
Technique Tuesday


Have a super rest of the week.
Val
Posted by
Moments 2 Remember
at
11:12 AM
3
comments
![]()
Friday, August 21, 2009
End of Summer Sale!
I can hardly believe it, August is coming to an end. Kids are going back to school and soon the leaves will be falling. I'm not ready for summer to end.
 My Mind's Eye "Life I Love You" scalloped 12x12 cardstock paper
& "Pure Joy" die cuts
$1
 Natural Butterfly Kit
 (featuring Basic Grey Marrakech patterned paper & TONS of embellishments)
$18
 Natural Butterfly Paper Pack (11 sheets of Basic Grey Marrakech patterned paper)--$4
Anyone wishing to place an order can e-mail me at sarahsines@imonmail.com I have limited quantities of everything so get your order in quick!!!! Happy shopping!
Posted by
Sarah
at
4:19 PM
0
comments
![]()
Monday, August 10, 2009
Technique Tuesday!!!
Today I'm going to show you a simple technique on glittering chipboard.
Glittering Chipboard
Supplies
Chipboard shape
Acrylic paint of choice
Martha Stewart glitter adhesive
Martha Stewart Glitter
Paint brush
Apply acrylic paint to chipboard
Let dry.

Apply Glittering adhesive to chipboard after acrylic paint dries.

Sprinkle glitter over chipboard, let dry.

Shake off excess glitter.

You are ready to adhere your glittered chipboard to your project. Here's what I did with mine.

Hope you enjoyed this tutorial!
Debbie
Posted by
Moments 2 Remember
at
2:45 PM
5
comments
![]()
Tuesday, August 4, 2009
August Kit release - Life is a Zoo
"Life is a Zoo"---Sometimes life really does seem like you are living in a zoo! This month's Moments to Remember kit is full of fun, playful patterns by Sassafras Lass to bring out the inner child in you. Perfect for zoo pictures, a playful child, or just your silly family! This month we decided to go even farther than just paper and embellishments and added 2 9x9 pieces of fabric! For just $20 this kit is a steal! Now, gather your silly kids and grandkids, make some monkey faces, and start scrappin'! Kit Contents: Patterned Paper (double sided--2 sheets of each): Sassafras Lass- Bungle Jungle: Tree Tops Sassafras Lass- Bungle Jungle: Pal Parade Sassafras Lass- Bungle Jungle: Bungle Dots Sassafras Lass- Bungle Jungle: Lost for Words Sassafras Lass- Bungle Jungle: Smooth Sailing Sassafras Lass- Bungle Jungle: Stampede Embellishments: Crate Paper: Little Sprout- Alphabet Stickers 1 5x7" Sassafras Lass: Wild Side- Chipboard Animal Stickers 3 Little Yellow Bicycle: Cool Guy- Clear Journaling Pieces (styles vary) 6 Petaloo: Flora Doodle Firecracker Daisies (various colors) 1 Tim Holtz Swivel Clasp 4 Sassafras Lass: Monkey Business Brads (styles and colors vary) 1 Large Green Gem Brad 3 Arrow Eyelets (various colors) 1 3x12" Brown Magic Mesh 1 9x9" Light Green Fabric 1 9x9" Baby Blue Fabric 12" Yellow Cord
Be sure to pick one up...only a few left!!!
Posted by
Moments 2 Remember
at
10:44 AM
3
comments
![]()
Wednesday, July 29, 2009
How about a few sneaks from the August kit!!!
Thought I'd show you a few sneaks from the August kit...you will love this kit! It's just so much fun! The paper the embellies and all that comes with it! It's the best kit money can buy! It's bright, and playful and you will love it! It will be the best $20 you ever spent!!


Be sure to check out the M2R message boards and gallery for some fun challenges and inspiration! Stay tuned for the full release of this beautiful kit!
Posted by
Moments 2 Remember
at
7:58 AM
3
comments
![]()
Tuesday, July 28, 2009
Tuesday Technique!!
For today's technique, I'm going to show you how to make really quick and easy flowers out of fabric!!! If you buy the August kit, you will be all set!!!
The first thing you need to do is cut a strip of fabric. It needs to be about 1.5" to 2" wide and you can determine the length. I used the fabric that comes in the August Kit and used the length of that fabric .
After to cut your strip out, fold it in half. If you iron a crease in it, it will make it easier. After you have done this, run a stitch along the length of the fabric. Do not put in a back stitch. You will want to have extra thread at the ends. 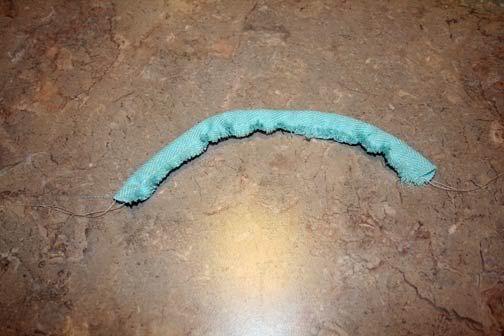
Start at one end of the strip and pull on one of the threads. This will start creating a gather on the fabric. Once you get about halfway, knot the end and go to the other end and pull on one of the strings to create another gather. Then, knot that end. 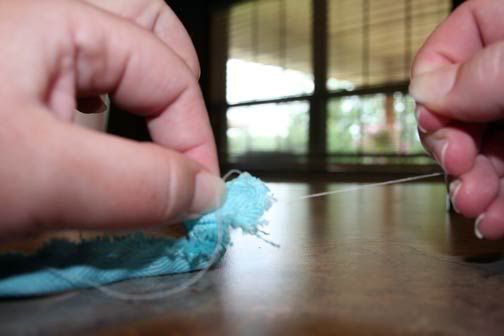
Double fold the ends and stitch. Arrange the flower and handstitch the layers to each other. Then, add a button or some sort of center for the flower. 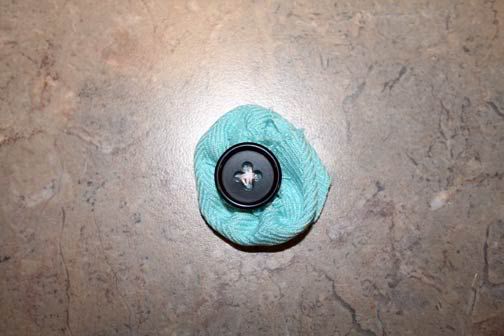
Another fabric flower I made for the August kit was a pleated flower. I cut a strip of fabric. Then, put in small handstitched pleats down the length of the strip. Once this is done, connect one end of the strip to the other so that it makes a circle. Add a button or other embellishment for the flowers center.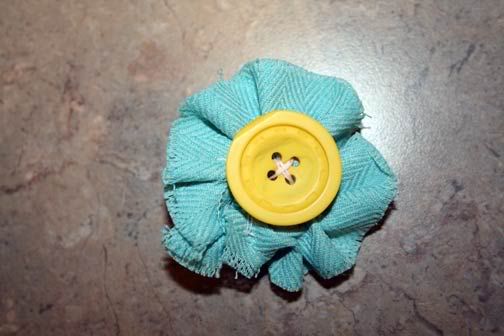
Posted by
Valerie
at
8:19 AM
5
comments
![]()


