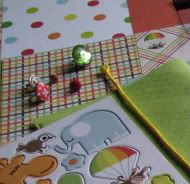
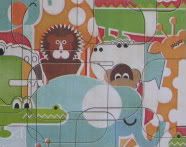
Our August kit is almost here!!!!! But, before I can reveal the WHOLE kit I must tease you with a few small peeks.
Hmmmmm....I know I said "small" peeks! This months kit is soooooo much fun! Stay tuned for more peeks (maybe BIG peeks) later this week.
Think you might NEED this kit?? Send an e-mail to sarahsines@imonmail.com to pre-order your kit today. Hint---this kit is a steal for just $20, so grab yours today!!!!!!
Sunday, July 26, 2009
August Sneek Peek!

Tuesday, July 21, 2009
Find Inspiration Everywhere!


Good evening bloggers! Today I am going to get you up and going on creating an inspiration journal. Everyday I see things that inspire me or intrigue me--tv commercials, blogs, nature, magazines, etc, etc. I always "think" I will remember these things later, but inevitably I forget. So, I created an inpiration journal to help me remember all those fabulous ideas that come up at odd times of the day.
Go out and purchase a small inexpensive notebook. This should be easy since school shopping has already started! You can do a standard size notebook or a smaller notebook--you pick! Now it's time to get creative. Cover your notebook inside and out with patterned paper, embellishments, and stickers to your liking. Viola! You have a creative inspiration notebook! Now all you need to do is fill it! Keep this notebook with you at ALL times. Write anything and everything that strikes you at the moment. Cut pictures out of magazines. Color in different color combination's you see. This journal is just for you so do whatever you like with it! When you get ready to sit down and scrap---grab your journal. All those wonderful ideas will come rushing back to you and in no time you will have created a fabulous layout (or two!).
Thursday, July 16, 2009
Design Team Challenges
Hi! Debbie here! The month of July has always been one of the busiest months of the year for me. In my home town we have a huge Old West celebration complete with a rodeo, carnival, parades and so much more!! The Design Team has been working hard to come up with some great challenges to inpire your creativity! Shannon has inspired the challenge for this week here it is in her words.
We're going exploring......locally -- what can you do around town? The zoo, the park, waterpark, flea market, a farmer's market, the library, local festivals? Let's see 'em!
Here is what she inspired me to create.
Stop by the boards and join us in some fun and inspiration!!!
Debbie
Tuesday, July 14, 2009
Technique Tuesday!
Today I'm going to show you how to make your own Dew Drops, I call them Skittles. This is a very inexpesive way to add embellishments to your layouts and flowers. They are easy to make and less expensive than buying them at the store. The bag of filler will cost around $5.00 and you willhave enough Skittles to last you forever!!You will need to make a trip to your local Michaels for the vase filler needed to complete this project.
Making your own Dew Drops (Skittles)
Supplies needed
1 bag of vase filler – can be purchased at Michaels in the floral section
Alcohol inks in various colors
Zip lock baggies

Pour a handful of skittles (or however many you want to color) in a baggie.
Add about 5 drops of Alcohol ink into the baggie and shake until all of the skittles are colored. Add more ink if you want them darker.
Leave baggies open to dry skittles. (about 5 minutes)
Organize in a container.
Use on your layouts!
Have fun with this!!
Debbie
Tuesday, July 7, 2009
*{Technique Tuesday}*
Reduce, re-use and recycle......so we're all tightening the belt a bit and well it's tough these days to justify spending money on extra supplies and stuff so I have been trying to come up with ways to use the stuff I already have.....and here's a quick way to make a background.....so here we go.....
You'll need:
A scrap of paper, paint, paint brush, and left-over foam dot sheet with all the holes punched out.....remove backing from one side and press it over a dish towel or your jeans to get rid of most of the stickiness -- that way it won't stick and rip the paper once you remove it.
You'll want to line up your foam sticker sheet with the scrap however you like -- if you want a continuous design or a random design, it's all up to you.
Then you will need to apply the paint to each hole.....the foam makes a great masking because it's thicker and there's less bleeding.....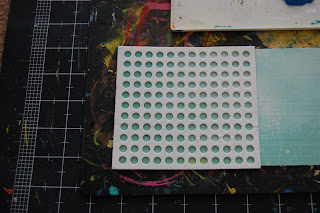

Once you have applied it, give it a little time to dry and then remove....you can add stickles, trace around each dot with a pen, add some bling in a pattern or randomly.....I chose to use mine as a card.


Thanks so much for checking out my tutorial and I can't wait to see what you come up with! XO, Shannon
Subscribe to:
Posts (Atom)